10 tips for safer and faster downhills on road bikes
The downhills are for many cyclists an unavoidable evil to suffer in cycling. What is normally fun and a reward after the effort of the climb becomes for them an extremely stressful situation and an agony that causes them even more fatigue, both physical and mental, than the pedaling itself.
It's time to remedy it. Apply these little tips that we explain below and you will see how little by little you will start to enjoy the downhill.

Tips for enjoying downhill rides on your road bike and going faster and faster
1. The bike set up
It is essential to check the bike before every ride and keep it in perfect condition in order to ride well. We need to be confident that the equipment will not fail when we are riding at 50 or 60 km/h.
Greased and adjusted drivetrain, there is nothing worse than a jump or a chain coming off when pedaling out of a curve; absence of looseness in wheels and steering that would not force an overexertion to guide the bike where we want; or check that the handlebar and stem bolts, as well as the wheel fasteners, are properly tightened to avoid scares.
2. Choose the right pressure
RECOMENDADO
The most important information about your bike that almost no one checks

The highest-paid cyclists in the world in 2026: Pogacar continues to lead the ranking.

When do helmets have to be changed? Do they have an expiration date?
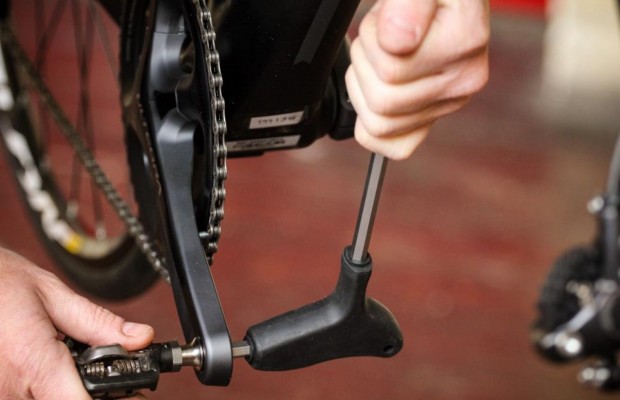
How to change the pedals of any bike in 5 steps

Tips for cycling in the rain

25 cycling gifts ideas to get it right
When you ask most cyclists what pressure they carry in their tires, most of them answer directly 8 kilos, and we are not talking about those who carry tubular tyres and put 10-11 bar. It is what they have always carried without considering whether the tyres they are carrying are tubular, clincher or tubeless, whether they are more or less flexible, the width of the tyres or the state of the roads where they are going to pedal.
A common mistake is to carry excessive pressure, thinking that this way we will ride better and what we get is the opposite result since the force of our pedaling is transmitted worse to the asphalt and, when descents come, we have less contact surface to give us grip.
Choosing the right pressure is still a personal matter, but few people experiment with different pressures. A good starting point is to follow the recommendations of the manufacturer of our tyres and then test on known routes the sensations we have by varying up or down until we find the values that give us the most confidence.

For rainy days, a little trick is to take 2 or 3 tenths of pressure off the pressure we usually use to sacrifice a little riding quality in exchange for a little more contact surface, which we will undoubtedly appreciate on a slippery road.
3. Well positioned on the bicycle
The average cyclist often only seeks the help of a biomechanist when suffering from an injury that limits pedaling. Beyond preventing physical problems or making better use of our strength, a good position on the bike is also a guarantee of better control over our machine.

It is not uncommon to see cyclists who never use the handlebar curve, or if they do, their arms are under tension. Nor is it uncommon to see riders who have their brake levers positioned in such a way that they can barely reach the levers with their fingertips.
In addition, it is essential that our body is positioned in such a way that the center of gravity of the bike/cyclist is as centered as possible between the two axles or, at most, slightly forward.
A position that is too far back takes weight away from the steering and reduces front wheel grip, while a position that is too far forward adds to the difficulty of cornering and creates instability in the rear end.
4. Hold on down
A quick glance at the handlebar tape of fellow group members reveals how most of them are clearly worn on the top and handlebar area, yet remain spotless in the curve of the handlebars.
When we ask why they never hold on in that area, the answer in most cases is due to the feeling of insecurity generated by that position, often due to incorrect measurements that, in some cases, cause them to barely reach that grip.

However, when we hold it down, we get a more solid grip that will prevent us from any surprises in the event of an unforeseen bump. In addition, lowering the torso also lowers the center of gravity, which improves stability. Finally, and perhaps most importantly, we operate the brakes from a position where we can exert more leverage, thus achieving a much more efficient stopping power.
5. The front brake is the one that stops you
The fear of not being able to stop the bike when the speed increases on the downhill and the next corner is inexorably approaching is without a shadow of a doubt the most stressful situation faced by those who suffer on the downhill. Being aware of the proper technique when stopping the bike can help us deal with this fear.
As a general rule, we should brake with the bike straight as we approach the curve, since doing so with the bike tilted can lead to a loss of grip on one of the wheels. If this happens on the front wheel, a crash is practically inevitable.
We will apply more or less intensity depending on our speed and if the curve is more or less closed, but always progressively and with greater emphasis on the front brake, which is the one that really stops the bike, using the rear brake as mere support. Rearwarding the butt as far as the saddle allows and adding a point of tension to the arms will help us to hold the braking and be able to apply more force.
The core of the matter comes when we reach the entry point of the curve where we will have to fight against our head to loosen the braking and tilt the bike towards the inside of the turn. If we continue to exert force, it will be difficult to turn the bike because of the extra weight supported by the front tyre.
During the turn, if the radius of the curve allows it, we will release the brakes to let the bike run towards the exit on the outside of the turn while, if the curve is very tight or steep, we can use the rear brake to keep the bike in the desired line.
6. Controls the inclination
How does the bike turn? A seemingly simple question, but one to which few people know the right answer. Obviously, it is the force we exert on the handlebars that causes the bike to turn, although not in the way you think.
At over 30 km/h the bike tends to maintain its upright position thanks to the gyroscopic effect caused by the wheels turning. It is by exerting a force on the front axle that the resulting reaction causes the set to tilt so that if we turn the handlebars to the right the bike tilts to the left side while if we turn the handlebars to the left the bike goes to the right. The opposite of what you might expect. This is what is known in the motorcycle world as counter handlebars.
Knowing this reaction and applying force in a conscious and controlled manner, we have a tool that allows us to achieve the desired degree of inclination at all times, knowing that we can straighten the bike if necessary with a slight pressure of our arms.

7. Foresee
There is nothing more stressful in a downhill as that feeling that work is accumulating and that we are encountering one surprise after another. This is a point we should never reach because sooner or later we will end up making a mistake that can lead us to the ground.
To avoid this, there is nothing better than to foresee what we are going to find by looking up and looking far away so that we can intuit the layout of the following curves before they arrive, try to see cars approaching a few curves below or discover any obstacle on the road in time to avoid it.
Also important when using your eyesight is to take into account the tendency to direct the bike to the place where you are looking. It is not uncommon that sometimes we try to avoid a pothole, leave our eyes fixed on it and end up riding over it. However, we can use this tendency to our advantage if, when we are riding through a curve, we fix our eyes on the apex of the curve and, after passing it, on the exit point.
8. Knows the downhill
It is obvious that on a familiar road we always descend with greater confidence than on a mountain pass we are riding for the first time. Fortunately, today we have tools that allow us to know what we are going to find.
Nothing better to discover the details of a downhill than Google's Street View tool with which we can go through every meter of almost any road, visualizing the type of curves it has or the general state of the asphalt.
Once on the bike, our GPS cycling computer can be a great help in predicting what the downhill will bring. By selecting a map screen, we can take a quick glance at the road layout between turns to see what's coming up next.

9. Relax
It is difficult to recommend to someone who is afraid to go downhill on the bike that the solution is to relax. However, it is something that we have to try to apply by all means since the muscular tension in arms and legs causes that we can not act on the direction with precision or suffer every slightest irregularity of the road.
A useful tip is to make sure your arms are semi-flexed on the handlebars instead of straight. It can also help, when you feel yourself getting stiff, to briefly shake your arms and legs to loosen them.
10. Practice
Like any other psychomotor skill, repetition and practice lead to mastering it more and more. Looking for routes where we can find downhills and putting the above points into practice will make us better and better downhillers.

Another invaluable help is to have a partner who can descend well and who has the patience to mark the lines without forcing the pace to gain confidence little by little.
Do you have any other tips you use to feel more confident on downhill rides? Tell us about it on our social networks!
También puede interesarte
Road
The most important information about your bike that almost no one checks
Road
The highest-paid cyclists in the world in 2026: Pogacar continues to lead the ranking.
Bike Equipment
When do helmets have to be changed? Do they have an expiration date?
Bike Equipment
How to change the pedals of any bike in 5 steps
Training
Tips for cycling in the rain
Road