Is it normal for tubeless tires to lose air overnight?
Tubeless has changed the way we understand tires in cycling. What started to gain popularity in mountain biking has spread to gravel and is increasingly present in road cycling. However, it is also important to pay attention to its maintenance, and you may have noticed more than once that your bike loses air overnight.
Tubeless has many advantages, but it also needs maintenance
For years, tubeless was a technology primarily associated with MTB. Being able to ride with lower pressures, improving traction on uneven terrain, and reducing pinch flats represented a significant change compared to traditional tubes.
These advantages are complemented by the ability of the sealing liquid to repair small punctures without stopping and a lower rolling resistance under certain conditions. It is precisely these benefits that have driven its expansion into gravel, where low pressures and protection against punctures are particularly interesting, and subsequently into road cycling.
Today, it is common to find mid-range and high-end bicycles prepared to use tubeless. But doing away with tubes also means that the airtightness depends on several elements that must work together: the tire, the rim, the rim tape, the valves, and the sealing liquid.
RECOMENDADO

The tubeless inflation revolution begins with this presentation. From click to total change?
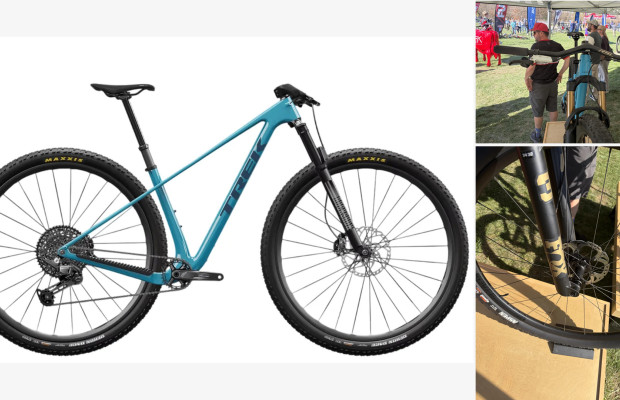
Trek offers a glimpse of its new 32-inch hardtail and an all-new Fox 34 fork

Butyl, latex and TPU inner tubes: what are the differences?

“I’m tired of this”: Paul Seixas opens up about his next contract and admits Decathlon is making him think twice

The UCI changes the rules for 2027: winning the MTB World Championships will earn more points than a Tour de France stage win

Zwift expands Watopia with three new islands and 17 kilometres of roads along the ocean
When one of them fails, air finds a way to escape. And it is not always obvious which one is responsible.
Is it normal for a tubeless tire to lose air from one day to the next?
The first thing to know is that a small loss of pressure does not necessarily mean there is a malfunction.
Tires are not completely airtight, and some models, especially those using lightweight and flexible casings, can lose pressure more quickly. Temperature also plays a role, and a tire inflated in a warm environment may show lower pressure the next morning if the temperature has dropped.
Even a newly mounted tubeless setup may need some time to achieve its final airtightness, as the sealing liquid must distribute itself inside the tire and seal the small pores of the casing.
On the other hand, finding a tire that has lost half of its pressure overnight or that appears completely deflated after a few hours is a different matter. In that case, it is advisable to investigate, because it is likely that there is a leak or some component is not sealing properly.
How to locate where a tubeless tire is losing air
Before disassembling the tire or starting to replace components, there is a very simple test that allows you to identify a good part of the problems.
Inflate the tire to its usual pressure, always respecting the limits of the tire and rim, and prepare a container with water and a few drops of soap. You can apply the mixture with a sponge or a spray bottle to the areas where you suspect there is a leak.
If bubbles appear that continuously form, you will have found a point where air is escaping.
It is advisable to check especially four areas: the valve, the junction between the tire and the rim, the sidewalls of the tire, and the spoke holes. The location of the bubbles usually gives a fairly precise clue, although the point where air escapes to the outside does not always coincide with the source of the leak.
From here, the most practical approach is to follow an order, starting with checks that do not require disassembling the tire.
1. Check the valves, one of the easiest points to fix
The valves are one of the first elements worth checking. A small leak in the valve core can gradually empty the tire without leaving any trace of liquid.
Apply soapy water to the top of the valve. If bubbles appear, check that the core is properly tightened. The sealing liquid can also accumulate inside and hinder its closure.

Sometimes it is enough to disassemble it, clean it, and put it back. If it is damaged, the simplest solution is to replace it. In fact, it is not always necessary to change the entire valve; a new Presta core can solve the problem for very little money, as long as it is compatible.
If air escapes from the base of the valve, where it passes through the rim, the cause may be a damaged rubber gasket, incorrect installation, or an issue with the rim tape.
Check that the valve is properly seated and that its outer nut has the correct tightness, without forcing it. If it continues to lose air and the gasket is damaged, it may be necessary to install new tubeless valves considering compatibility and rim profile.
There is an important detail: the appearance of bubbles around the base of the valve does not necessarily mean that it is the culprit. Air can also enter the inside of the rim through poorly sealed tape and end up escaping through the valve hole.
2. Check the sealing liquid
The next suspect is the tubeless liquid, especially if you haven't checked its condition for several months.
The sealant does not remain unchanged inside the tire. Over time, some of its liquid components evaporate or are consumed when sealing small leaks. The result can be a tire practically without active liquid, although there may still be dry residues adhered to the casing inside.
Temperature, climate, and product formulation influence its duration. As a general reference, it is advisable to check the condition of the sealant every few weeks, especially in warm and dry conditions.

To know how much is left, you can remove the core and use a small stick or a specific tool to check the level, or partially unseat the tire if necessary.
If you find little liquid, add the amount recommended by the manufacturer for your tire size. If it is very degraded or has significant accumulations of dry material, it may be more convenient to remove the remnants and renew the sealant.
If you have doubts, try quality tubeless liquids and ensure they are compatible with your tires.
After adding it, inflate the tire and move it in different positions, tilting it to both sides to help the liquid reach the sidewalls as well. It is not necessarily enough to spin it vertically, because centrifugal force tends to concentrate the sealant on the tread.
In many cases, this operation is sufficient for a tire that was losing air overnight to maintain pressure correctly again.
3. Check that the tire is properly seated
If the liquid is in good condition and the valves do not have leaks, it is time to check the junction between the tire and the rim.
For a tubeless system to work, the tire beads must be properly seated against the rim surface. If there is a small deformation, accumulated dirt, or a poorly placed area, air can escape from that point.
The soapy water test is particularly useful here. Apply it around the entire junction between the tire and the rim, on both sides of the wheel.
When bubbles appear in a specific area, it is advisable to deflate, check for any dirt residues, and re-seat the tire.
It may also help to apply a specific mounting product or a small amount of soapy water on the bead to facilitate it reaching its correct position.
In any case, you should never exceed the maximum pressure allowed by the tire or rim in an attempt to get it to seat. This is especially important in hookless road systems, where compatibility between tire and rim is crucial.
If the problem persists after several attempts, it is necessary to check that both components are compatible and do not show deformations.
4. The rim tape may be the culprit even if you can't see it
This is one of the hardest failures to identify because the responsible element is hidden beneath the tire.
In many tubeless-ready rims, the rim tape is responsible for sealing the spoke holes and preventing air from entering the wheel structure.
When the tape loses adhesion, breaks, shifts, or is not the correct width, air can seep into that cavity and end up escaping through the spoke holes or around the valve.

Therefore, if you observe bubbles at the spoke nipples when applying soapy water, you should suspect the rim tape, although it is also advisable to rule out a problem in the valve area. In this case, it is usually necessary to dismount the tire.
Remove the tire and inspect the entire surface of the tape. Look for wrinkles, cuts, raised edges, or areas where the adhesive has stopped adhering properly.
If the tape is damaged, it is advisable to replace it completely, clean the rim surface well, and install a new one.
Make sure to use a quality rim tape, with an appropriate width for the internal channel and following the manufacturer's installation instructions. A tape that is too narrow may leave areas unsealed, while poor installation can cause new leaks even with newly installed material.
Pay special attention to the valve area and avoid damaging the tape when making the hole for its insertion.
5. If air escapes from the sidewalls, it may be the tire itself
Not all tubeless tires have the same level of airtightness. Some competition tires use very thin casings to reduce weight and improve flexibility. These constructions can be more permeable to air and rely more on the sealing liquid.
In a new tire, especially MTB or gravel, it is possible to observe small wet spots on the sidewalls during the first uses. This is a sign that the sealant is reaching the pores of the casing.
If the losses are small, redistributing the liquid and using the tire may help complete the sealing.
However, when bubbles appear persistently, it is advisable to carefully examine the tire to rule out small cuts, damage to the sidewalls, or problems at the beads.
Old punctures can also start to lose air again when the liquid dries up or the sealing stops being effective.
When the casing shows significant deterioration or a break that cannot be safely repaired, adding more sealant will not solve the problem. In that case, the tire will need to be repaired with an appropriate procedure or replaced.
6. If nothing works, check the rim itself
This is less common, but a damaged rim can also prevent the system from maintaining pressure. A strong impact can deform the area where the tire bead sits. Cracks or damage in the internal channel can also appear, compromising airtightness.
If you have checked the valves, renewed the liquid, correctly installed the rim tape, and verified the condition of the tire, but the wheel continues to lose air, it is advisable to inspect the rim.
In case of any suspicion of cracks, significant deformation, or structural damage, it is best to stop using it until a professional inspects it.
When is it worth renewing the entire tubeless system?
If the setup is several years old, the valves are deteriorated, the rim tape has issues, and the liquid has not been renewed for a while, it may be more practical to redo the entire installation rather than continue fixing leaks separately.
For this, there are complete tubeless kits that include rim tape, valves, and sealing liquid. They allow you to renew the internal elements that make the system work, without needing to replace the tires or wheels, as long as they are in good condition and compatible with tubeless.

The important thing is not to start changing parts randomly. With an orderly review and the soapy water test, it is possible to locate a good part of these leaks without directly resorting to a complete disassembly.
And although tubeless requires a bit more attention than traditional tubes, its advantages remain significant. Checking the pressure before each ride, keeping the liquid in good condition, and periodically checking the valves and rim tape are simple habits that allow you to take advantage of the system without finding a flat tire every morning.
También puede interesarte
Bike Equipment
The tubeless inflation revolution begins with this presentation. From click to total change?
Mountain bike
Trek offers a glimpse of its new 32-inch hardtail and an all-new Fox 34 fork
Bike components
Butyl, latex and TPU inner tubes: what are the differences?
Road
“I’m tired of this”: Paul Seixas opens up about his next contract and admits Decathlon is making him think twice
Road
The UCI changes the rules for 2027: winning the MTB World Championships will earn more points than a Tour de France stage win
Road
