How to change the pedals of any bike in 5 steps
You are not the first or the last to ask yourself a seemingly simple question: how do I change the pedals on my bike? The operation does not seem to have any complications, but there are those who get stuck and those who don't do it properly. Here are the 5 steps to do it right.
How to change your bike pedals in 5 steps
Either we turned where it wasn't or they were simply stuck. That doubt was the one that flew over our first change of bike pedals. Many laughs here and there, but many of us, the first time we changed the pedals of our first bike, we did not hit the button. Something wasn't right and we didn't know what.
RECOMENDADO
How to wash your cycling clothes? 10 keys to make them always look new

This is how they erase the penises that are drawn on the roads of the Tour de France

How to lose body fat? Differences between losing weight and losing fat
When must the tubeless tire sealant be replaced? What quantity?

Free alternatives to Zwift

Guidelines for a perfect and safe tanned cyclist
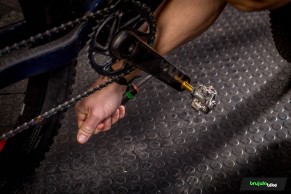
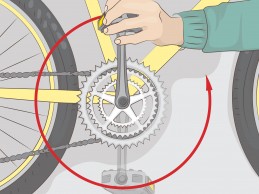
The opposite turn of each nut on each pedal is the first thing to go wrong. Think about this: if the pedals were tightened with the natural turn of the cranks (normally, unless you work in the circus, you pedal forward), it would be impossible to remove them when the time comes. Constant tightening would make it impossible to unscrew them. That gives you a clue.
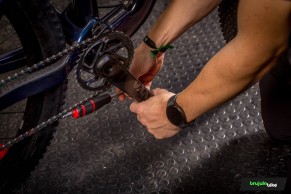
But, step by step, this is what you have to do:
- Gloves and protection: it may seem obvious to you, but only those who have had a plate tooth stuck in a bad hit know how much it hurts. When it comes to applying pressure to loosen the pedal, you wouldn't be the first or the last to lose contact and hit yourself. Put on a glove and put the chain on a large plate. It may not happen, but if it does you will thank us for this advice.
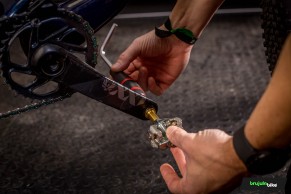
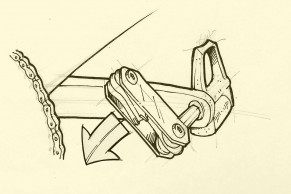
- Right pedal: start with the right pedal, the one on your right foot, the one on the development side, the one of the plates. This pedal should be turned anti-clockwise when viewed from the outside. If you use an allen key on the inside (some pedals require this) this rule is altered. So you know: counterclockwise seen from the outside.

- Left pedal: just the opposite, seen from the outside, clockwise. So, we remind you, if you change the pedal from inside, look at this clockwise rule seen from outside.

- Removes impurities and lubricates: once the pedals have been loosened and removed, clean with a cloth and some non-corrosive liquid, grease slightly, and prepare the new pedals.
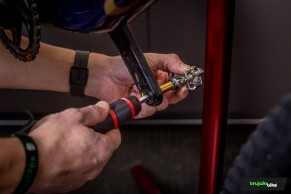
- Put the new pedals in place: here it's logical, notice that you put the left pedal on the left side and the right pedal on the right side, it's a mistake that makes you angry. Push to a logical point that is firm but does not damage anything. If you have a torque spanner, it is better than better, look at the indicated value and you will be super precise.
When to change the bike pedals
There are many scenarios in which bicycle pedals are often changed. The most common are, first of all, when we transport the bike. A pedal takes time to wear out or break, so we will most likely have to dismantle them to pack the bike and take it on a trip. It is not because of the weight, there are 30 gram pedals, but because they are annoying when you have to fit the bike in the car.

From here on, the next case is usually for damage or breakage. If your pedal is broken, there is no debate. But when do you know if it's worn out enough to change it? Easy: don't be fooled. If your pedal doesn't engage properly, if its turn is already gnawed off, if it's slow, or if it makes a noise, these are unmistakable signs that it's time to change it.
And one last case, this one for gift periods: for an upgrade. Yes, many cyclists still ride with platform pedals, they haven't discovered the cleats and clipless pedals. Unless you are a freestyle, when you try the cleat you never leave it. And decent pedals are a tiny investment, so don't be afraid, you know how to install them.
