How to mount a SRAM AXS step by step
The mere thought of an electronic derailleur often conjures up the image of something more complicated than a cable derailleur. But this does not have to be the case, and especially in the assembly phase they can be quite simple. In fact, it is much easier to install than a mechanical one.
So that you don't get overwhelmed and know exactly how to install it on your bike, we have prepared a video in which we tell you how to mount a SRAM AXS step by step. Why this one in particular? Because this is probably the most popular range of electronic groupsets on the market, in its different Eagle AXS mountain models (including the very economical GX Eagle AXS). And that's not counting the road and gravel eTap AXS.
How to assemble a SRAM AXS rear derailleur step by step
Although until recently electronic derailleurs were little more than a rarity in MTB, the truth is that they are becoming more and more popular, not to mention on the road cycling scene. So follow these steps if you want to get started with your new SRAM AXS derailleur:
RECOMENDADO
The most important information about your bike that almost no one checks

The highest-paid cyclists in the world in 2026: Pogacar continues to lead the ranking.

When do helmets have to be changed? Do they have an expiration date?
How to change the pedals of any bike in 5 steps

Tips for cycling in the rain

25 cycling gifts ideas to get it right

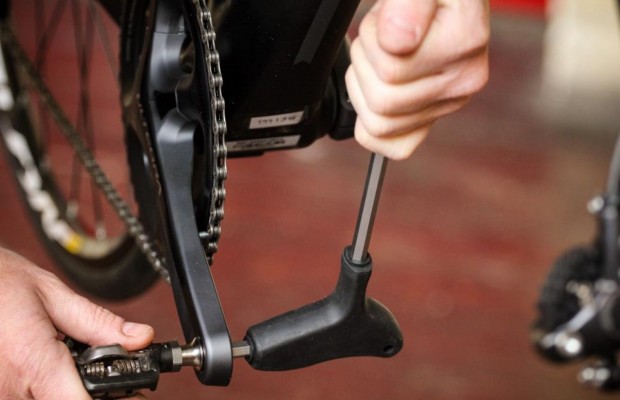
- Fixing. As you will see in the video, the first thing you will have to do is to fix it to the frame, screwing it with the help of a 5 mm Allen key. Then, you will push the pin forward while pressing the clutch button so that it stays in that position.

- Chain. Once this is done, it is time to insert the chain between the sheaves and close it. Preferably with a quick link, which allows you to do this more easily with the help of pliers.
- Clutch release. Now all you have to do is push the lever forward to disengage the clutch and the derailleur moves into place.


Control and settings on the SRAM AXS
-
Pairing. At this point, it's your turn to focus on the controller. Attach it to the clamp, which may or may not be SRAM Matchmaker, and press and hold the AXS button on the derailleur until the light on the derailleur starts to flash. Then do the same with the button on the shifter, again until the LED flashes. Still without releasing the button, press the shift button once, and the two will be definitively paired.
- Adjustments. Finally, we move on to this phase. Move the pedals and, using the shifter, move the chain up to the second largest sprocket. Check that the gap between the upper pulley and the largest sprocket on the cassette is 3 mm. And now you can check the derailleur.
- Micro-adjustments. In case it is difficult to go down or up, you will resort to micro-adjustments. These are quite simple: you hold down the AXS button on the controller while you move the lever in the direction in which it is struggling.


And that's it. With these 6 simple steps, you should have your SRAM AXS rear derailleur mounted, adjusted and ready to ride with peace of mind.
También puede interesarte
Road
The most important information about your bike that almost no one checks
Road
The highest-paid cyclists in the world in 2026: Pogacar continues to lead the ranking.
Bike Equipment
When do helmets have to be changed? Do they have an expiration date?
Bike Equipment
How to change the pedals of any bike in 5 steps
Training
Tips for cycling in the rain
Road
