5 things to check on your bike before every ride
Getting up on a Saturday morning, rushing to the last minute, taking the bike with barely enough time to get to the meeting point with your group mates, taking a couple of pedal strokes and finding yourself frustrated by a mechanical problem that puts an end to the ride before it has even started. A few basic checks can help you to avoid problems. Here are the 5 things you should check before each ride so that this situation doesn't happen again.
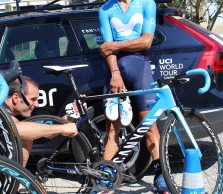
5 things you should check before every outing
Tyres
The pressure of our tyres is an essential aspect of the grip they offer us and our safety on the road. Although it is a good idea to inflate them to the right pressure minutes before the ride, especially if you use latex inner tubes, which are more porous and suffer a progressive loss of air, it is a good idea to check them the night before. You wouldn't be the first person to take the bike and find a flat tyre. We will also make a small visual inspection to check that there is no glass or small stones embedded in the tyre that could cause a puncture after a few kilometres.
Drivetrain
There is nothing more annoying than a derailleur that refuses to go up to the desired crown or a chainring that doesn't go down when we reach that 10% ramp that we always get stuck on. Keeping the drivetrain clean is one of the basic maintenance tasks for a perfectly functioning bike. If we are not particularly dedicated, rubbing the chain with a rag and removing the grease sticks that accumulate on the derailleur cogs can help us to get by. Of course, this basic cleaning must be followed by the necessary lubrication.
RECOMENDADO

When do helmets have to be changed? Do they have an expiration date?
The best apps for cycling and mountain biking

Black Friday 2025 cycling bargains: save on Garmin, POC, Maxxis and more

Black Friday Garmin 2025: the ultimate guide to choosing your GPS at the best price
How to wash your cycling clothes? 10 keys to make them always look new

Cycling can help you fight the effects of the time switch
Just a drop of lubricant on each link on the inside of the chain to prevent centrifugal force from pushing out the oil we have just poured. Finish the job by using the rag again to remove any remaining lubricant from the side plates, which will only serve to attract dirt.
Again, we recommend that you do this the evening or night before to ensure that the oil has properly penetrated the chain links and is doing its job better.
We will also take the opportunity to check the adjustment of the derailleur and that all the sprockets mesh perfectly, especially those at the ends to prevent the chain from slipping off towards the spokes or the frame, which could cause a lot of damage.

Quick Release Locks
Although this is a problem that has almost been forgotten with the generalisation of bikes with disc brakes and the use of thru axles, we have already encountered more than one person with a lock that was practically loose, with the risk that this poses to safety. Although it is unlikely, if you have levers to tighten or loosen the thru axles, it is not impossible that a snag or a bad support when leaving the bike could loosen the lock. It doesn't cost anything to check before setting off.
If we still use traditional quick-release brake pads with traditional quick-release wheels on our road bike, this check is essential. Check that the lock is closed to the end of its travel, adjusting the nut on the opposite side so that it reaches and exerts the necessary pressure. We will also position the fastener in such a way that it is difficult for it to get snagged. Our recommendation is to position the front one with the lever pointing backwards and the rear one well protected between the chainstay and the tie-rod, although it will depend on the shape of your fasteners. Try until you find the ideal position.
Steering
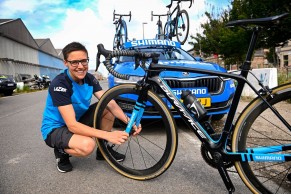
This part of the bike is often one of the most overlooked by cyclists, as it is hardly ever a source of problems. This is why small gaps are often missed, which directly affect the handling of the bike, making the lines more imprecise and reducing braking efficiency.
To check that everything is in place, keep the front brake tight while pushing the bike forward and backward. If any slack appears, it can be solved in a simple way by loosening the side bolts that hold the stem, increasing the preload by slightly tightening the upper bolt that compresses the bearings so that the slack is eliminated and the steering maintains a smooth turn. Finally, we fix the stem again by tightening the side bolts. For this last step we should use a torque spanner, although if we don't have one we can get out of this step by counting the number of turns we loosen the bolts and then leave them in exactly the same position.
Batteries
Even though electronic groupsets have eliminated almost all of the problems we used to experience when shifting gears, surely you all know someone who has been unable to shift mid-route when the battery ran out of power.
The long battery life of each charge -more than 1,000 kilometres, more than two years for the batteries of the SRAM and Shimano wireless levers- means that we often don't realise how much range is left until it's too late.
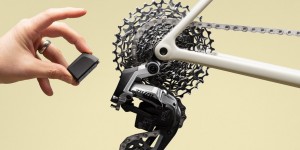
Checking the charge level is as simple as holding down one of the shift levers in the case of Shimano Di2 and observing the LED on the control unit, if it changes to red. On Campagnolo EPS we will have to briefly press the adjustment button on the inside of the levers. Again, the red colour indicates that we are reaching the end of the range. Finally, in the SRAM AXS groupsets, a small LED is activated on the rear derailleur or front derailleur when each of them is operated, either from the levers or from the derailleur itself. A task that can also be carried out using the mobile application of each of the groupsets.
In addition to the battery of the gears, we must also include in the check the battery of our GPS cyclocomputer, lights and, what to say if we are users of an e-bike.
These are simple tasks that if we include in our pre-ride routine, just as we prepare the clothes, the bars or the isotonic drink in the water bottle, they will help us to avoid the occasional disappointment that frustrates that route we have been thinking about all week.